Testing
Some New Rules:
Browsing
through early copies of Battlegames one afternoon recently, I came
across in Issue 7, March/April 2007, an article on re-fighting the
Battle of Ravenna 1512 by Adrian Hussey. This was accompanied by his
set of hex-based rules for re-fighting the early 16th
Century Italian Wars. Reading through the rules, I realised that,
with some adjustments (minor and major), they could provide a
fast-play set of rules for my 1674-79 armies. So I spent several
hours writing them out and altering rules to fit for the types of
units, weapons and tactics available in the late 17th
Century. Out went Gendarmes, Pike Blocks, Stradiots, etc., and in
came Cuirassiers, Light Horse, Musket and Pike Foot, etc. I do not
have small hex terrain, so one hex became 3”; movement and weapons’
ranges were altered accordingly. The Shooting and Mêlée rules had
minor alterations and some additions as well. The Fatigue Points
(units gradually accumulate these during a battle) and Morale (very
simple based on unit quality) were left almost unchanged.
Having
completed the rough revision, I then set out a table for a battle,
French vs. Allies, of roughly equal sides: the French had three Foot
(Pike and Shot) Regiments, four Light Horse regiments (each of two
squadrons) and one medium Artillery battery; the Allies had three
Dutch Foot (Pike and Shot) Regiments, two Dutch Light Horse
regiments, one Austrian Cuirassier regiment and one medium Artillery
battery. The number of figures per unit is irrelevant for the rules
as all actions, whether Shooting, Mêlée, Movement, etc, are carried
out by the whole unit. However, Cuirassier squadrons are double the
size of Light Horse squadrons, partly because Austrian cavalry units
were always much larger than anybody else’s at this time (as indeed
were their infantry regiments) and partly owing to their tactics,
i.e. manoeuvring at a steady pace in a compact, dense formation,
which was a legacy of the Habsburg wars with the Ottoman Turks.
Artillery batteries were not part of an organised artillery unit at
this time, although the gun detachments may have worn a uniform.
The game
unfolded at a good pace, even though I was playing it solo. With
multiple players, it would have raced along, I feel sure. And this,
in fact, was rather pleasing as I wanted to get a set which was
quicker to play than my existing rules, which are a fast play version
of Mr. Gush’s WRG Renaissance rules. Although these play much
faster than the full set, they are still a bit slow when multiple
players are involved. On a club night, members want to get on with a
game, move figures, resolve shooting and combat, then deal with
morale quickly; standing around waiting is very much a negative!
Moreover, there are no command restrictions on players (no drawing
cards, rolling dice, or expending points!), so they can get on with
moving units and fighting with them, which is what any gamer really
wants. Nothing is more frustrating than sitting, waiting for your
units to “activate” so they can then do things. And what if,
which is not impossible, they never “activate”? A wasted night at
the club! In my experience, players are more than willing to win/lose
by their own decisions than be controlled/guided/limited by command
restrictions.
Anyway,
the various rules and amendments seemed to me to work very well. At
no point did anything unrealistic or unhistorical happen, at least
from my knowledge of the period. The Cuirassier squadrons proved
tough to beat, usually needing Light Horse squadrons to act in
combination; artillery was fairly insignificant, especially as it
cannot move again once deployed, other than to realign to engage
targets; while the foot regiments fired and fought hand-to-hand in
slow, grinding combats which caused heavy losses. To keep track of
the status of units during the game, I used coloured counters, each
representing a particular condition, e.g. Red – Rallying, Green =
Following Up, Black = Routing. Fatigue Points were recorded by
placing a casualty marker (used for other rules) with numbers on the
underside. It makes the tabletop look a little untidy, but it helped
with learning and refining the rules. However, status and Fatigue
Points could be noted down on a basic record sheet, altered as
appropriate.
At the
end of the game, after twelve turns, the battle was at an evenly
balanced situation. Neither side had a clear advantage: the cavalry
actions had ended almost evenly, the French had lost their artillery
battery (overrun by Austrian Cuirassiers), and one Dutch foot
regiment had been pushed back repeatedly in mêlée, but had not
broken. However, what was important was that it had not taken long to
master the basic rules, that it had generated plenty of food for
thought about the rules themselves, and I had already, during the
course of the game, made some useful amendments and additions.
French
Units:
Cavalry:
Cuirassiers
du Roi (two squadrons)
Commissaire
Général (two squadrons)
La
Reine (two squadrons)
Infantry:
Piémont
(one battalion)
Lyonnais
(one battalion)
La
Fère (one battalion)
Artillery:
One Medium Battery
Notes:
The
Cuirassiers du Roi was the only French Light Horse regiment to wear
the cuirass during this period. It was established in 1665. Officers
in all Light Horse regiments were meant to wear a cuirass, but this
was a rule honoured more in the breach than
the observance. The regiment’s uniform was a blue coat with red
facings, which was that worn by almost all “royal” regiments, i.e
those who counted the king as their colonel-in-chief.
The
Commissaire Général cavalry regiment was so named in 1656. It got its title from the third most senior officer's rank in the cavalry arm. It was originally established in 1635. The regiment’s uniform was a grey coat with
black facings.
La
Reine cavalry regiment was established in 1666 and, although a
“royal” regiment, wore a red coat with blue facings as its
uniform, as a gesture to the queen, the unit’s colonel-in-chief.
Piémont
was the one of the oldest infantry regiments in the French army,
having been formed in 1569. It was one of the “Vieux” regiments,
which included Picardie, Champagne, Navarre, Normandie and La Marine.
Its uniform was a grey coat and cuffs, with no facings, although
black was used as the colour for items like neck scarves and socks.
The
Lyonnais infantry regiment had a tradition dating back to the early
17th
Century; it was founded in 1616. Its uniform was a grey coat with red
facings.
La
Fère was one of the youngest infantry regiments in the French army.
It was created in 1661 from one of the regiments that belonged
previously to Cardinal Mazarin, the regiment Vaisseaux-Provence; La
Fère had been that unit’s garrison town. Its uniform may have been
a grey coat with red facings.
Allied
Units:
Cavalry:
Caprara
(two ‘double’ squadrons)
Waldeck
(two squadrons)
Nassau-Friesland
(two squadrons)
Infantry:
Nassau-Friesland
(one battalion)
Aylva (two battalions)
Artillery:
One Medium Battery
Notes:
Caprara
was the oldest regiments of cuirassiers in the Austrian army, having
been raised in 1629, during the Thirty Years’ War. Its uniform was
a buff coat with red facings and officers and men all wore a cuirass
and a German-style “lobster-pot” helmet.
Waldeck was a fairly old Dutch cavalry regiment, having been founded
in 1629; it was maintained by the province of Holland. Its uniform
may have been a grey coat with red facings.
Nassau-Friesland
was one of the youngest cavalry regiments in the Dutch army, only
having been established in 1668; it was maintained by the province of
Friesland. Its uniform was probably a dark blue coat with red
facings.
The
Nassau-Friesland infantry regiment was one of the youngest foot units
in the Dutch army, having been raised in 1666. It was maintained by
Friesland and was one of the few infantry regiments in the Dutch army
that had two battalions at this time. It was often referred to as the
“Friesland Garde”. Its uniform was probably a blue coat with red
facings.
Aylva
was one of the most senior infantry regiments in the Dutch army,
having been raised in 1577. It was maintained by Friesland and, like
the Nassau-Friesland infantry regiment, it had two battalions. Its
uniform was probably a grey coat with blue facings.
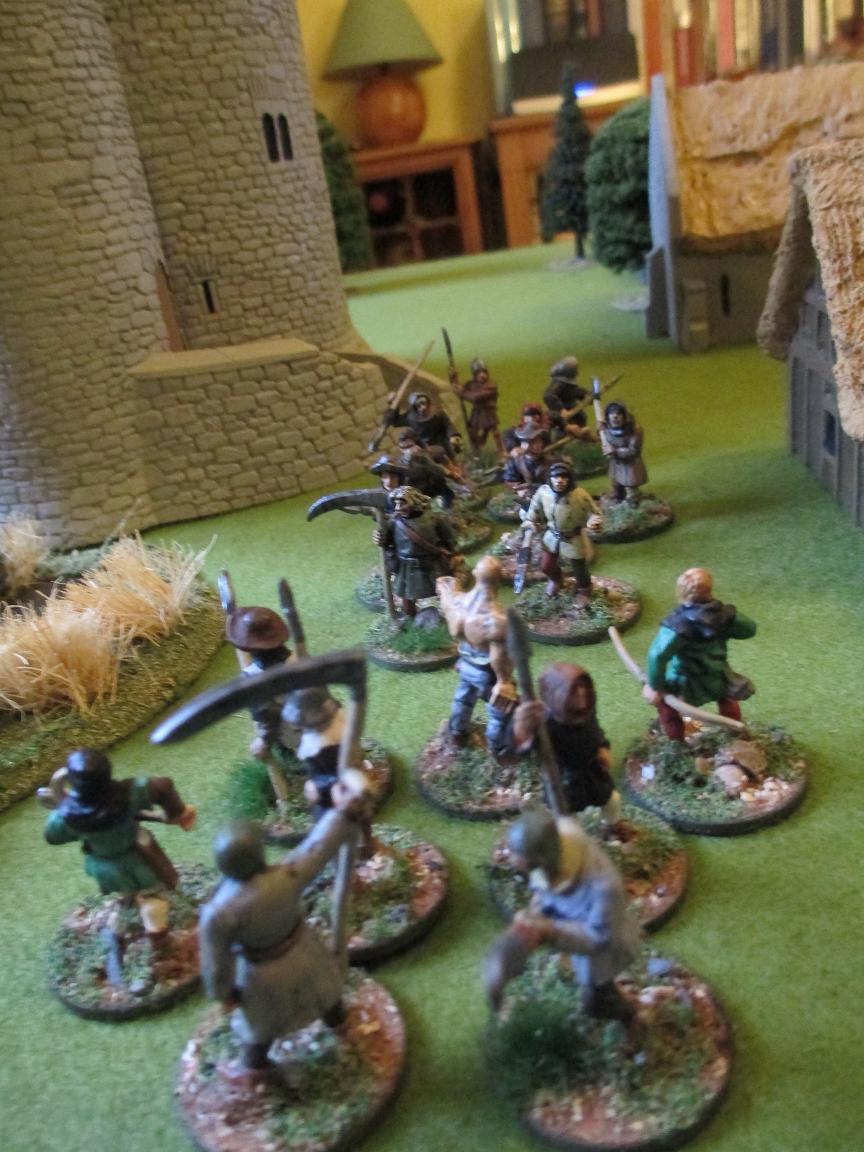
And so for some pictures of the battle:
And so for some pictures of the battle:

An aerial view of the tabletop: French at the bottom edge, Allies at the top edge.

Allied right flank cavalry: Nassau-Friesland nearest, Waldeck further away. Almost all cavalry flags are from League of Augsburg excellent range for the late 17th Century. All my Sun King figures are Copplestone Castings, now with North Star Miniatures, with the exception of the artillery pieces and the most of the generals, like the one shown here, which are from League of Augsburg.

The flags are home made, based on a picture in B. Mugnai's
The Army of the United Provinces of the Netherlands 1660-1687.

The Dutch Foot Regiment Aylva (2nd Battalion).

The Dutch Foot Regiment Nassau-Friesland. The flags are from Maverick Models.

French left flank cavalry: Commissaire General nearest, La Reine in the background.


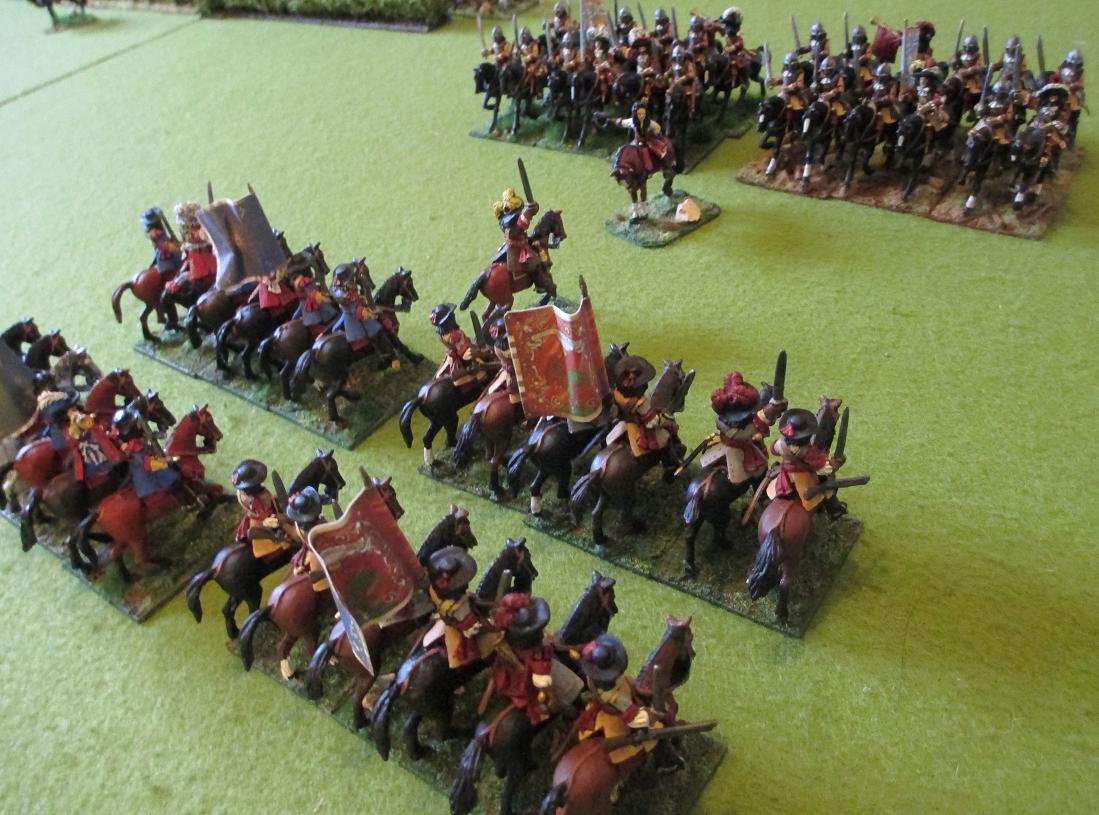
Purists may spot that the cuirassiers are wearing English "lobster pot" helmets; this is because this range of figures does not include Austrian/German types. Having looked at some other ranges, the models proved to be rather smaller than the big Copplestone/North Star figures!

their flags are homemade, using an image in R.Hall & G. Boeri's
Uniforms and Flags of the Imperial Austrian Army 1683-1720.


The red counter indicates that battalion of the Aylva regiment is Rallying.


and the cavalry were compelled to retreat.