Last week was a Sun King week and so I decided to have a game trying the rules for Pike and Musket in his book 'Wargaming: An Introduction'. I went through them first to make some pre-game adjustments to allow for the fact that my 1670s units are not based as required, as well as a few tweaks to try and make them more 1670s specific. After that, I decided it might be a good idea to base the game on a battle from a different period, but one which was quite Pike and Musket in the deployment of the opposing armies and the terrain. I wont say which one, but tell you later. See if you can guess!
The scenario has the Dutch army having just recaptured a fortress town from the French and resting on their laurels. To their surprise, a French force cuts their lines of communications back to Holland. So the Dutch have to set off and reopen their supply lines. The Dutch have the larger army, but the French have more cavalry. The two sides draw up for battle close to the Klein Mopdorp, with most of the Dutch troops to one side of a stream, but otherwise with an open field for action. The French deployed their infantry to cover the village and their stronger cavalry divided between their two wings.
The game was to last twelve turns. The Dutch had to break through to the village; the French had to prevent them doing so.
The Dutch have four cavalry regiments and seven infantry regiments and a battery of cannons. The French have eight cavalry regiments, one irregular cavalry regiment and four infantry regiments.
Here are some photographs with explanations:
Six feet by four feet table set out - stream, road and village - very simple scenery, and the opposing sides - Dutch to the right of the picture, French to the left.
From behind the Dutch lines.
The view from the other end, Dutch to the left, French to the right.
The French left wing cavalry - four regiments each of two squadrons. If you are unfamiliar with wars of the later 17th Century, the squadron was the tactical unit for cavalry, usually made up of two or three companies each of roughly 40 or 50 men. Line regiments tended to have two squadrons each, though some French ones had three or more. The Maison du Roi cavalry only had companies, but they were often twice the size of a normal squadron.
The French infantry, with two squadrons of Croats out in front; the latter were not used by the French in the 1670s in Flanders, but the original battle required them, so there they are.
The French right wing cavalry, four regiments each of two squadrons.
The locals discussing tactics.
"I think he will hold in his centre and attack on his wings," the baker's wife said. "You're probably right," said the farmer's wife, "but the Dutch might advance en echelon." "Centre, wings, en echelon? Oh dear," said the famer, "I think they'll both ruin my turnips, whatever they do!"
The Dutch left wing cavalry, two regiments each of two squadrons.
Looking along the Dutch centre - seven regiments of foot, plus a medium artillery battery out front.
The Dutch right wing cavalry - two regiments each of two squadrons.
End of Turn One, with the French (blue arrows) advancing their cavalry wings and using their Croats to harass the Dutch line, while the Dutch cavalry manoeuvre to try and delay the numerically superior enemy while the Dutch infantry advance.
The Dutch left wing cavalry was very much out of position across the stream, while the French right wing cavalry was facing off against infantry, so neither had an ideal start.
The Dutch battery banged away for most of the game with varying degrees of success,
until overrun by French cavalry.
The Dutch commander.
The French commander.
Dutch Waldeck Cavalry Regiment clashes with Croats.
Dutch Beaumont Foot Regiment firing on Croats.
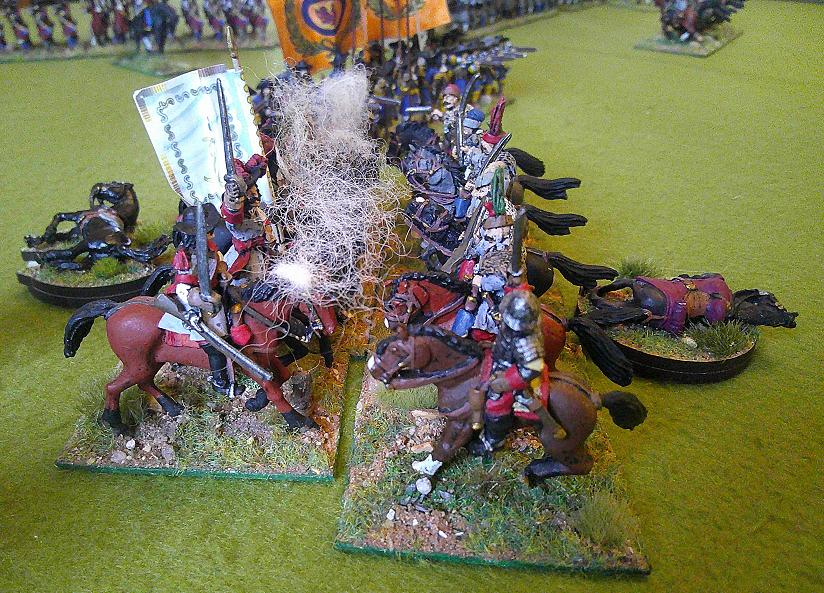
Commissaire-Général Cavalry Regiment clashes with Waldeck Cavalry Regiment.
End of Turn Two, with the opposing cavalry engaging nearest the camera, while those in the far distance are still manoeuvring. The Dutch foot regiments have halted already owing to the approaching French cavalry.
The Dutch left wing cavalry pass by half the French right wing cavalry as the latter moves forward, but the rest of the French cavalry is moving to cover the stream against a possible flank attack.
Dutch Berlo Cavalry Regiment against French Tilladet Cavalry Regiment.
Berlo's regiment breaks in rout and is pursued.
Croats, armed with pistols and carbines, harass the Dutch Beaumont Foot Regiment.
End of Turn Three and matters are not looking good for the Dutch left wing, which has been flanked already and is somewhat on the back foot. In the distance, the Dutch foot are manoeuvring to counter the French cavalry threat and keep moving forward as well.

Royal Cravattes Cavalry Regiment skirmishes with the Dutch Ingen-Nielant Foot Regiment, the latter having formed a Stand of Pikes, i.e. a square in 19th Century parlance (hence the odd arrangement of their bases), which cavalry cannot attack - all those long pikes in dense formation - but which in itself cannot move and has a much reduced firepower, owing to the musketeers trying to shelter behind and beneath the pikes. I have not yet found a convincing explanation for how a Stand of Pikes against cavalry was formed by this time. When the ratio of pike to musket was greater or equal, I could see how it might work, but by the 1670s the ratio was one pike to two or three or even four muskets at times. Some French text do us a term 'fraising' which seems to have been alternate rows of muskets and pikes, facing forward, rather than trying to form a Stand of Pikes with all-round protection against cavalry. However, even then it would have meant perhaps two lines of musketeers, then a line of pikes, then two lines of musketeers, then a row of pikes, and so on, with the men closely packed together so the pikes reached far enough forward. They would also need flanking protection from other similarly drawn up units.


Turn Four, with the French left wing cavalry having gained success against the Dutch right wing cavalry, with the latter's infantry trying to form a blocking position against the French horse. In the centre, the Dutch foot are trying to drive off the French cavalry with musketry.
Stands of Pikes and cavalry squadrons exchanging fire, not very effectively.
The French cavalry lines the stream ready to oppose a crossing by the Dutch left wing cavalry.
A squadron of Villeroi Cavalry Regiment and some Croats charge the Dutch Beaumont Foot Regiment. Somewhat surprisingly, the cavalry got beaten off a bit easily, which made me wonder about the rules a bit!
End of Turn Five, with things looking bad on their right wing for the Dutch, but with the French cavalry threat against their infantry having been reduced in the centre,
End of Turn Six, with the French left wing cavalry gearing up for a serious flank move behind the Dutch infantry centre. In the distance, a battalion of the Aylva Foot Regiment can be seen heading for the right wing as reinforcements.
Tilladet Cavalry Regiment attack the Dutch Reede Foot Regiment, but get beaten off pretty convincingly, mainly because the defensive fire rather weakened the cavalry as they charged home.
Lots of skirmishing across the stream by the opposing cavalry, while the French cavalry units which had advanced against the Dutch foot start to pull back.
End of Turn Seven, with the French left wing cavalry about to flank the Dutch foot, while in the far distance the cavalry opposite each other across the stream have engaged, after the Dutch mounted units attacked across it.
Nassau-Friesland Cavalry Regiment and La Reine Cavalry Regiment exchanging blows at the stream.
End of Turn Eight, with the French cavalry having flanked the Dutch foot, but the latter in the distance are beginning to advance once more.
The Dutch cavalry's attack across the stream did not go well, being repulsed somewhat bloodily by the French horse.
The remnants of the Dutch right wing cavalry attacked the French Humieres Foot Regiment, which promptly broke and ran! Howeverm the French foot were rated mainly Raw for this battle, whereas the Dutch foot were mostly Average, which may explain why they did better against cavalry!
Colonel-Général Cavalry Regiment charges Aylva Foot Regiment. Another bad idea by the French cavalry commander, as this squadron was annihilated in the combat!
End of Turn Nine and the Dutch Aylva Regiment has somewhat taken the shine off the French left wing cavalry's flanking move by blocking it. In the centre, the Dutch foot has got going, with the Gardes te Voet Foot Regiment leading the advance in the middle of the table.
The redoubtable Dutch foot putting up a fine defence against the French cavalry.
Another squadron of Colonel-Général Cavalry Regiment has a go, but was also repulsed!
End of Turn Ten, with the French left wing cavalry rather stymied as the Dutch infantry grinds inexorably forward, the French right wing cavalry falling back before them.
The Dutch battery overrun by a squadron of the Cuirassiers du Roi Cavalry Regiment.
Turn Eleven over, with the French left wing cavalry trying to get behind the advancing Dutch infantry before they close the distance to the French infantry line.
Gardes te Voet Foot Regiment and Grancey Foot Regiment exchanging musketry fire.
The Dutch Guards charge home, but the French unit holds firm, but only just!
End of Turn Twelve, with the game at its end. The Dutch have run out of time as they have not secured the village and the French have held them off.
The infantry combat in the centre of the battle close to the village.
The French right wing cavalry falling back. The Dutch left wing cavalry was entirely destroyed in its attempt to cross the stream and flank the French line.
It was a very enjoyable game, fast and furious at times, especially the cavalry engagements, but I think I will need to make further tweaks to the rules, especially regarding the cavalry attacks on infantry in line. I think they would work well for large battles with multiple players trying to complete in a single day's play as they are very straightforward to use.
Did you guess the battle?
I'll reveal it next post or confirm it if someone gets it right in a comment,
Best wishes for the holiday season and a prosperous and healthy New Year to all!