Tuesday, 15 February 2022

My Thirty Years War campaign has progressed into 1619. Two battles occurred, both between the Elector Palatine and the Duke of Bavaria for control of the Upper Palatinate. The first engagement ended in a draw, with the Electoral army having to withdraw; the second action was a resounding victory for the Elector's army and the Bavarians had to abandon the Upper Palatinate.

All the figures are 15mm metal form various manufacturers accumulated over the last forty five years. Most of the trees are homemade )lichen, twig and plasticine base) and are almost as old as some of the figures! Hoses are homemade from matchboxes and card; hills are made from foam sheets. The roads and river were bought (cannot recall the manufacturer), the latter made from mdf painted blue, the former rubber painted a suitable dirt colour and backed with felt.

Here are some pictures of the first battle:

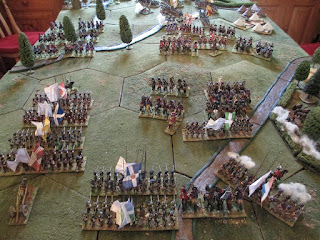
The battlefield, the Bavarians are on the right of the camera, the Electoral forces on the left.
The random battlefield generator produced a lot of scenery for this action, certainly not the more open terrain one would expect for this period.
The battlefield viewed from the other end of the table.
The Bavarian main position, foot and artillery.
The Bavarian left wing was formed from all of their cavalry units.

The Elector's right wing detachment, which harassed the Bavarian cavalry successfully,
but then failed to cross the stream.
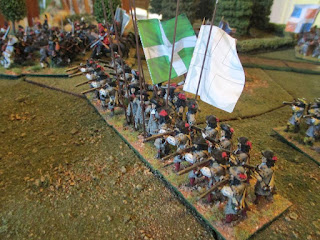
Some of the Elector's foot ready to advance; regiments of foot in the foreground and a battalion of Commanded Shot in the background.
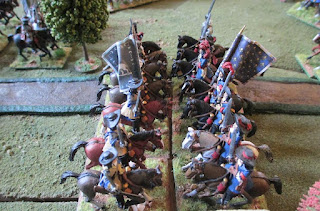
The Elector's centre, with cavalry jammed in alongside the stream owing to the lack of space on that side of the battlefield.
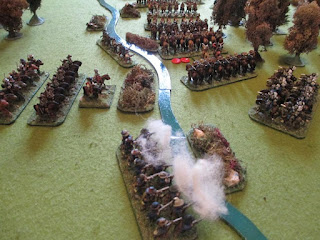
Cavalry engaging across the stream, fired on by Electoral infantry.
The view over the village from the Bavarian artillery position. The Bavarian gunners spent most of the game shooting at the Electoral cavalry in the distance, but with mixed results.

The Elector's dragoons join in the firing on the Bavarian cavalry. The counters (not very aesthetic for photos, but all part of a "normal" game!) indicate a unit has suffered reductions in its fighting status: red is still "formed", but black means "unsteady".
The cavalry action in the centre of the battlefield.
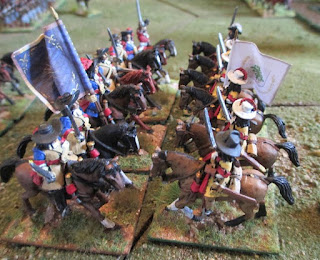
There are two types of general bases: mounted, as shown here, and foot. If attached to a unit they give a bonus in combat, help units rally quickly and act more to the general's wishes.
Bavarian foot  with a general base - the latter the wrong way round! Encouraging the foot regiment behind with a stirring speech perhaps?

The Elector's foot charging the Bavarian units on the ridge.

The Bavarian unit in the lower right corner has been taken in front and flank by its opponents.
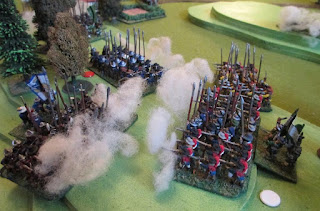
Musketry all along the line. Under the rules, foot have to be stationary to fire, 
but can do so twice in a move.
Cuirassiers about to take on light horse.

The Bavarian artillery is attacked. Under the rules, the gunners get a chance to fire, but if contacted by their assailants they are automatically overrun.
The white counter indicates a "disordered" unit, which means the next adverse effect on it will cause it to break and rout.


The end of the battle. The Bavarians have held on successfully on their left and centre. Although their infantry is struggling still against the Elector's foot on the ridge, they latter have not gained a decisive victory.


Thursday, 10 February 2022

Inspired by my recent ACW game with Steve and the few units I painted for it, as well as being mindful of my main New Year's resolution for wargaming - To Paint Everything Still To Be Painted Before Buying Any More! - I have been busy painting ACW figures.

I had already stockpiled half a dozen boxes or so over the last several years of Perry 28mm hard plastic miniatures and have been busy making them up and painting them. I am a fan of hard plastic I admit, and they are easy to paint and they remind me so much of the first Airfix plastic figures I had all those decades ago. They are fiddly to stick together though if you have big fingers!

I have adopted a general approach to the uniforms and unit standards by not being specific about each unit by giving them a national flag or a state flag and painting them for late war (1864-65), so not having to be too exact. As a result, the Confederate units are in a range of drab colours and equipment, while the Union are in standard dark blue coats and pale blue trousers.

Here are some pictures of the end products:

Units are all twenty figures, with two officers, a colour bearer, a drummer (mostly) and sixteen riflemen. Bases are 4cm by 4 cm squares.


I did this unit of Confederate Zouaves as a composite regiment, with a variety of uniforms including dark blue, brown and light grey.


Yellow ochre, orange brown, light grey, pale blue, various browns, leather, black, earth, tan yellow, I went for considerable variety in the colours. The standard is the Louisiana state flag.


A nice looking brigade, I think!

I have eight more units to go and I must say I have really enjoyed painting them so far. I think they look alright from a distance anyway! I have two cannons and crew and some cavalry as well. The problem is I am going to need some generals...


Saturday, 5 February 2022

 As promised, the basic rules for my Thirty Years War campaign:

a)     The campaign lasts for 30 turns, each one representing a year of four seasons, beginning with 1618.

b)     Each year has four seasons – Spring, Summer, Autumn and Winter. Each power can move their ARMY or ARMIES during the first three seasons, but not in Winter; the latter is a “consolidation” phase.

c)     Each POWER starts with either one ARMY or two ARMIES. Some “powers” begin the campaign from outside the Holy Roman Empire and others start inside it.

d)     France, the United Provinces, Austria, Spain, Denmark and Sweden all start the campaign from their TERRITORIAL AREAS outside the Holy Roman Empire.

e)     The Elector Palatine, Saxony, Brandenburg and Bavaria all start the campaign from their PROVINCES inside the Holy Roman Empire.

f)      The map is divided into PROVINCES which ARMIES move between by the arrows linking separate PROVINCES. No movement is possible between PROVINCES that are not linked by an arrow. All arrows are bi-directional (<->), except those (=>) from TERRITORIAL AREAS to a neighbouring PROVINCE; in the latter case, an ARMY of the owning POWER can enter and leave a PROVINCE along such an arrow, but no other POWER’s army can enter a TERRITORIAL AREA by such an arrow. An ARMY leaving a TERRITORIAL AREA may choose any one of the available arrows.

g)     At the start of Spring, Turn 1 (1618) the ARMIES of the different POWERS are distributed as follows

                  Spain = One ARMY in the Spanish Netherlands; One ARMY in Spain.

                  Austria = One ARMY in Austria.

                  Bavaria = One ARMY in Bavaria.

                  United Provinces = One ARMY in the United Provinces.

                  Elector Palatine = One ARMY in either of the Bohemia provinces.

h)     At the start of Spring, Turn 8 (1625) Denmark enters the campaign with One ARMY.

i)      At the start of Spring, Turn 12 (1629) France enters the campaign with Two ARMIES.

j)      At the start of Spring, Turn 13 (1630) Sweden enters the campaign with One ARMY; Saxony enters the campaign with One ARMY; Brandenburg enters the campaign with One ARMY.

k)     Any POWER whose ARMY enters the PROVINCE of a non-active POWER, i.e. one that has not yet entered the campaign, automatically activates that POWER early.

l)      For each season (except Winter), a POWER can move its ARMY or ARMIES from one PROVINCE to any neighbouring PROVINCE. If the latter contains a hostile ARMY, then a tabletop battle is fought; if not, then the moving POWER occupies the PROVINCE. Its ARMY must remain there until the Winter season if the moving POWER wishes to “secure” that PROVINCE, otherwise it can move on to another PROVINCE in the next season.

m)   After a tabletop battle, the winning ARMY remains in the PROVINCE, the losing ARMY retreats to the PROVINCE it came from. If the tabletop battle is a draw, each ARMY retreats to the province it came from. However, if one ARMY was already in the PROVINCE where the battle was fought, it remains there and the other ARMY retreats. Each ARMY must then rest for a season, whether it is the winner or loser, before it can move again. However, it can fight a battle if attacked by another ARMY.

n)     A tabletop battle lasts 12 game turns, but if it occurs in the Summer season, add 3 turns to the battle’s duration to represent longer daylight hours.

o)     A PROVINCE that has been “secured” becomes part of that POWER’s territory and can have an ARMY or ARMIES deployed into it at the start of the Spring season.

p)     Each POWER has basic Victory Conditions it must meet as indicated below:

                  UNITED PROVINCES – “secure” all neighbouring PROVINCES and prevent them falling to hostile POWERS,

                  SPAIN – establish the “Spanish Road” (see below for definition) and prevent the United Provinces securing all neighbouring PROVINCES to its TERRITORIAL AREA.

                  FRANCE – prevent Spain from establishing the “Spanish Road” and “secure” all neighbouring PROVINCES to France.

                  AUSTRIA – “secure” Bohemia (both PROVINCES) and as many other PROVINCES as possible which were held by the Elector Palatine or neutral at the start of the campaign.

                  ELECTOR PALATINE – keep control of all PROVINCES held at the start of the campaign.

                  BAVARIA – “secure” as many other PROVINCES as possible which were neutral or held by the Elector Palatine at the start of the campaign.

                  SAXONY – “secure” as many other PROVINCES as possible which were neutral at the start of the campaign.

                  BRANDENBURG – “secure” as many other PROVINCES as possible which were neutral at the start of the campaign.

                  DENMARK – “secure” as many other PROVINCES as possible which were neutral at the start of the campaign.

                  SWEDEN – “secure” as many other PROVINCES as possible in the Holy Roman Empire.

q)     Victory Points: Tabletop Battle Won/Lost +5/-5 VP; Tabletop Battle Drawn + 2 VP; Province “secured” or lost +5/-5 VP. Victory Points are cumulative through the course of the campaign, so each POWER will have a running total.

r)      In addition, individual POWERS have the following Victory Point bonuses:

                  Spain + 10 VP if the “Spanish Road” (a continues line of PROVINCES connecting Spain and Spanish Netherlands) is complete at the Winter season of that turn.

                  France + 10 VP if the “Spanish Road” is not complete at the Winter Season of that turn (this only applies once France has entered the campaign.

                  Elector Palatine + 10 VP if all original PROVINCES still controlled at the Winter season of that turn.

                  Brandenburg + 10 VP if all neighbouring PROVINCES to Brandenburg are neutral or have been “secured” at the Winter season of that turn.

                  Saxony + 10 VP if three or more PROVINCES have been “secured” at the Winter season of that turn.

s)      At the start of Spring, Turn 1 (1618), Spain, Austria and Bavaria are allied. An ally’s ARMY may enter an ally’s PROVINCES, but they cannot remain there to “secure” them at the Winter season of that turn. At the start of Spring, Turn 13 (1630), the United Provinces, France and Sweden are allied and the same rule applies to those POWERS.

t)      Each ARMY has a basic strength of:

                        One Cuirassier Squadron

                        Eight Horse Squadrons

                        One Dragoon Squadron

                        Four Foot Regiments

                        One Medium Gun Battery

                        Four Generals (Two Mounted, Two Foot)

            In addition, each POWER is entitled to bonus units for a tabletop battle:

                        1) roll 1d6 for units: odds mean no reinforcements; evens mean reinforcements – roll 1d6 or 1d8 twice as appropriate according to the list below of the relevant POWER.

                        2) roll 1d6 for generals: evens mean no additional general; odds mean add an extra general to the army – re-roll 1d6, with evens meaning an infantry general, odds meaning a cavalry general.

            UNITED PROVINCES          1 = One Cuirassier Squadron

                                                            2 = One Foot Regiment

                                                            3 = One Foot Regiment

                                                            4 = One Heavy Gun Battery

                                                            5 = One Commanded Shot Battalion

                                                            6 = Fieldworks

                                                                (any Gun Batteries and any Two Foot Units)

            FRANCE                     1 = One Horse Squadron

                                                2 = One Horse Squadron

                                                3 = One Horse Squadron

                                                4 = One Horse Squadron

                                                5 = One Heavy Gun Battery

                                                6 = One Heavy Gun Battery

            SPAIN                         1 = One Lancer Squadron

                                                2 = One Foot Regiment

                                                3 = One Foot Regiment

                                                4 = One Light Battery

                                                5 = One Lancer Squadron

                                                6 = One Light Battery

            ELECTOR PALATINE          Automatic = One Commanded Shot Battalion

            SWEDEN                    1 = One Horse Squadron

                                                2 = One Horse Squadron

                                                3 = One Horse Squadron

                                                4 = One Horse Squadron

                                                5 = One Foot Regiment

                                                6 = One Foot Regiment

                                                7 = One Heavy Gun Battery

                                                8 = One Light Battery

            AUSTRIA                   1 = One Cuirassier Squadron

                                                2 = One Lancer Squadron

                                                3 = One Foot Regiment

                                                4 = One Foot Regiment

                                                5 = One Heavy Battery

                                                6 = One Heavy Battery

            SAXONY                    1 = One Cuirassier Squadron

                                                2 = One Commanded Shot Battalion

                                                3 = One Foot Regiment

                                                4 = One Foot Regiment

                                                5 = One Heavy Battery

                                                6 = One Heavy Battery

            BRANDENBURG, BAVARIA, DENMARK are all as for SAXONY

Monday, 31 January 2022

Somewhere in the Rhineland, 1675, the Battle of Schwarz Ridge.

Taking advantage of the fact I could use the dining room for a second day, I reused the hex scenery set out for my ACW game earlier in the week to have Sun King game. I used a scenario from C.S. Grant’s book, Programmed Wargames Scenarios, the Flank Attack. I had to reverse the map to allow for the fact my ridge ran the opposite way to that in his scenario, tweaked the scenery to make the table a bit more interesting, and then adjusted the forces so that they were more suitable for a late 17th Century engagement. I then played the scenario as if both sides were programmed.
The French were the attackers, the Allies on the defence. By the close of play, after fifteen turns (the table was needed for Sunday dinner!), the French had gained possession of the west end of the ridge and were threatening to seize the Allied camp, but their supporting frontal attack, which had pinned the Allies in position, was suffering heavy casualties. I have added a map of the battle at the end of the photographs, along with the forces of the two sides.

The battlefield with the Allied army deployed to meet an expected frontal assault.
The Allied right wing cavalry - Dutch and Hesse Kassel units.
The Allied centre - Dutch, Münster, Imperial and Brandenburg units, along with their artillery support.

The Allied left wing horse - Dutch and Spanish units, with Imperial Croats at the rear.
The Allied dragoons - the Dutch Marwitx Regiment.
The French cavalry enter the table - three regiments at the head of each column.


The French cavalry engages the Allied horse as the French foot units begin to arrive on the field.
French foot - Grancey at the front, Douglas behind.
Champagne followed by Condé.

At the bottom right, Condé Foot Regiment wheels to engage the Dutch dragoons.
Normandie and Royal Italien enter the battlefield behind Douglas.


La Couronne and Guiche arrive on the battlefield.
Royal Cravattes and Alcantara in action.
The Dutch Reede Foot Regiment.


Squadrons of Royal Cravattes and Colonel-Général fighting Waldeck and Alcatara. Under the rules, an existing combat can be reinforced from the rear of flank by a supporting squadron.
The Cuirassiers du Roi charging the Allied medium gin battery. The attack was a success, the battery being overrun, but the French squadron was severely weakened by hailshot.

Hoornbergh and Roi in action on the Allied right wing.

Condé and Marwitz fight it out in the wood.
Allied foot units hastily realigning to meet the flank attack.
Baden-Durlach firing on the Cuirassiers du Roi.

The Brandenburg unit, Grafen von Dohna, with a grenadier company on its right flank.
Alcantara breaks in rout,


The two sides exchanging musketry amongst the trees.
In the end, Condé prevailed and the dragoons fled the field.

The Croats about to engage Dauphin, not a wise idea for the hussars, as they were routed easily by the more disciplined French horsemen.
Reede fending off French cavalry with steady volleys.
Cuirassiers du Roi attacked Baden-Durlach, but were beaten off by the infantry.


The French medium gun battery in draught. The French artillery did not get into action at all during the game, unable to get into the line of battle.


The Dutch Ingen-Nielant Foot Regiment.


Plenty of Allied horse squadrons holding the French left column's cavalry at bay.


Reede were charged by French cavalry, but beat them off easily.

The French left column's infantry units deploying for their frontal assault to pin the Allied line.
The French right column's infantry units moving along the ridge.


Erbach and Commissaire-Général fighting near the farm.


Reede and Champagne exchanging volleys.
The French frontal attack goes in. Normandie shooting at the Allied light gun battery, which lashed them with hail shot in return.

Reede on the left succumbed to a French cavalry charge into its flank, the unit surrendering rather than be put to the sword, whereas Münster on the right beat off a frontal charge.
Plenty of musketry all along the opposing lines.
Grancey charged Grafen von Dohna and was beaten off.
Normandie advanced on the Allied light gun battery, but suffered such losses that its attack stalled.


Grancey attacked again, but was taken in the flank by Hoornbergh and destroyed in the ensuing combat.
The battlefield at the close of play (the table was required for Sunday dinner!). The French pushing along the ridge and towards the |Allied camp, but stalled in front, although their cavalry was making progress near the farm.


Opposing Forces:

French:

            Right Wing Column:

                        One C-in-C General

                        Two Brigade Generals

                        Four Foot Regiments

                        Three Cavalry Regiments (each two squadrons)

                        One Medium Gun Battery

            Left Wing Column:

                        Two Brigade Generals

                        Four Foot Regiments

                        Three Cavalry Regiments (each two squadrons)

                        One Light Gun Battery

Allied:

            Left Wing:

                        One Brigade General

                        Two Cavalry Regiments (each two squadrons)

                        One Hussar Regiment

            Centre:

                        One C-in-C General

                        One Brigade General

                        Six Foot Regiments

                        One Medium Gun Battery

                        One Light Gun Battery

            Right Wing:

                        One Brigade General

                        Three Cavalry Regiments (each two squadrons)