The second game in my small ACW campaign - the Battle of Hazel's Creek. Two Union infantry brigades have fallen back from the first action at Robinson's Farm and taken up position behind the creek, sending off for reinforcements. The cavalry brigade had escaped northwards and it was hoped they too would arrive to assist with the defence. The Confederate generals, flushed with success, launched their three brigades - two of which were somewhat depleted from the first battle - against the Union position, the fourth brigade of their division not yet up in support. In the event, the Union side put up a good fight, but the Confederates got over the creek on the defenders' left, forcing them to withdraw, though the latter's reinforcements came up in time to reinforce the line. However, two Confederate brigades were somewhat mauled in the fighting and their fourth brigade did not arrive in time to exploit the success on their right wing. The Union cavalry tried to get involved, but were blocked by the presence of Confederate troops nearby, so in the end they swung past the battlefield and headed south. Rules are Neil Thomas' ACW with home amendments, figures Perry hard plastic 28mm.
Monday, 24 February 2025
ACW Mini-Campaign Battle of Hazel's Creek
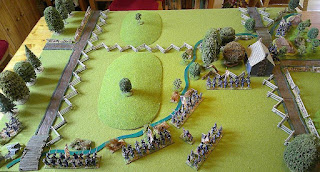
The table - four feet by three feet - view from the west.
The two Union brigades deployed behind the creek: Grout on the left, Farthing on the right.
The three Confederate brigades move on to the field: Higgins on the right, Crockett in the centre,
Varley on the left. Crocket's brigade was the weakest.
Varley attacked Flack's Wood.
Higgins attacked up the road towards the Union left wing.
Varley's lead regiment suffered awful losses from three Union regiments and broke and ran.
Platt's Battery firing in general support of the advance.
Varley's men attack across the creek and drive back the Union defenders.
Grout's men ready to defend the creek on the Union left.
Varley is over the creek on the left, Crockett is pushing along the ridge line, while Higgins' brigade has shaken out in to line ready to attack.
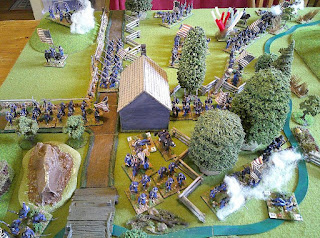
Crockett's brigade is drawing fire from the Union left, as is Higgins' troops on the right, with both Confederate batteries (12pdr smoothbores) in action. Varley on the left is suffering from the Union troops holding Munn's Bluff and Flack's Farm.
Led by their zouaves, Higgins' brigade attack down the road towards the Union left, taking canister from B Battery, 4th U.S. Deciding discretion was the better part of valour, the Union gunners limbered up and withdrew from the field.
Crockett's brigade has stalled on the ridge, Varley's is being shattered on the left, though hanging onto Flack's Wood, while Higgins' troops are in a good position to assail the Union left, now the latter's artillery has withdrawn.
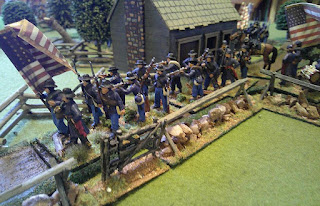
Plenty of defensive fire from the Union regiments on their left.
Varley has pulled his battered men back on the left, ceding Flack's Wood back to Farthing's troops. The rules allow a unit to rally back lost bases, the idea being a lot of lost figures are not actually casualties but men who have fallen back and will now re-join the colours, which means Varley is not out of the fight yet.
Higgins' brigade fronts to their left, preparing to cross the fence and attack the Union left, where one regiment has already retreated off the field, like their artillery. In the Confederate centre, Crockett has fallen well back to rally.
The Union reinforcements arrive - Fisher's brigade - along with their division commander, Major General McGregor. Both sides had to roll for the arrival of fresh troops from Turn 6 onwards, but in the end they were delayed until Turn 8. And, as mentioned, the Union cavalry could not get on to the table at all.
The Confederate reinforcements - Bolt's brigade - enters on their right wing. The Confederates had to roll to see whether they came onto the table on the right hand road (as above) or the left towards Flack's Farm.
Higgins' brigade going in, led from the front by their bold commander.
On the right, Bolt's brigade is deploying behind Higgins' regiments, ready to press the attack on the Confederate right. Varley has made an unsuccessful feint towards Flack's Wood again, while Crockett has rallied his troops and is going forward to support Higgins.
Crockett's troops pushing forward along the ridge, also led by their brigade commander.
Bolt's leading regiments deploying into line.
Pressure builds on the Union left wing, though supports are coming up.
Crockett's leading regiment charges the Union line, but gets repulsed trying to get across the creek.
Platt's Battery has pushed forward onto the ridge and starts lashing the Union troops with canister. On the Union left, Higgins has got a regiment over the creek unopposed.
Confederate regiments falling back and going forward as Crockett and Higgins press their attack.
In goes a Tennessee regiment and breaks the Union defenders.
Grout starts pulling back his Union regiments as Higgins crosses the creek, the latter having Bolt's fresh brigade in close support.
View from behind the Union lines as Grout starts pulling back on the left to establish a line along the fences west of Flack's Farm.
Higgins reorganises his brigade ready to advance, but Crockett is out of the fighting, as is Varley, their units too depleted to be effective.
The Union left is reforming ready to meet another attack, but the Confederates halt their advance. Turn 15 reached, which was the limit I set for the game.
Final positions at the end of the game.
The map shows the general movements of the opposing forces. The thick red arrows show Crockett's and Varley's attacks being repulsed, with Higgins' and Bolt's thrust on the Confederate right. The blue circles on the Union cavalry arrow off the table are where they tried to enter the battlefield, but could not owing to the proximity of Confederate infantry.
I now have to decide which way things go for the next battle. I am tempted to shift the fighting to the east of Flack's Farm, using fresh forces for both sides, but I may decide to see if the first Confederate division - under the successful Major General Carraway - can flank the Union line to the west. Perhaps more infantry vs. cavalry as with the first battle? I think sixteen units each side on this size table works okay, so I do not want to pile more in on this one.
The Thomas rules give a fun, quick game, but I have incorporated some of my own ideas into them. The rallying back bases is a bit odd - a unit down to one base can, in theory, rally back its three lost bases (units normally have four) and then go back in again. I have altered this a bit - if they fail on their rallying roll, I declare that base lost entirely, which seems a bit more realistic. Also there are no generals in the original rules, but I think they are important for command and control, so have incorporated them into the rules.
Labels:
ACW
Subscribe to:
Post Comments (Atom)


No comments:
Post a Comment