It being an ACW month I decided to carry on with my mini-campaign with another action. This time the Union is on the offensive. Both sides have dug in on their last positions and the Union commander, Major General McGregor, has decided to use his last brigade to try and outflank the Confederate defences, supported by another infantry brigade and his cavalry brigade. I played the Union command, with the Confederates as the non-player. They had the units on East Hill (see picture below), but their commander, Major General Carraway, had a suspicion that the Union might try to turn his flank, so he had sent off an infantry brigade to guard it, and called in his cavalry brigade as extra support.
The game was on a 4 feet by 3 feet table, to last 12 turns, with a die roll to see if extra turns were available thereafter. In the end, it played for fourteen turns. Other than the first Union brigade, all other formations arriving had to roll a die to see if they came on at a specified turn or were delayed: 4,5,6 they arrive, if not, re-roll, +1 to die each turn thereafter, except a 1 is always a fail. A formation could not enter at its designated point if an enemy unit was within 6" of it and would have to come in further away. The Union had to capture East Hill, get two units off the nearby road, capture Philby's Farm and the ford, and push their cavalry across Dingle Creek. The Confederates had to hold East Hill, repulse the attack, and use their cavalry to capture Philby's Farm and the ford and secure the crossroads. Rules used were Mr. Neil Thomas' ACW, with home amendments. Some regiments are three bases, not four, because they carried over losses from the previous action. The Union also had an off-board rifled battery giving support from the south-east corner of the table, firing as far as East Hill and the central south-north road.
My assault turned out to be a bit of a shambles, but I did get into the Confederate works and secure the road, but did not get any troops off the exit, while Philby's Farm and the ford were still being contested at the end of the game. Nonetheless it was a most enjoyable game, pretty realistic, and with a result, sort of! Here are some photographs.
The table set out.
Crockett's Brigade on East Hill. The defences are hasty works.
End of Turn One, with Munning's Brigade entering the table to lead the attack. In the works to the left, behind Hazel's Creek, is another Farthing's Brigade, which can give fire support, but is not allowed to leave its defences.
The Union off-board battery opens fire on East Hill.
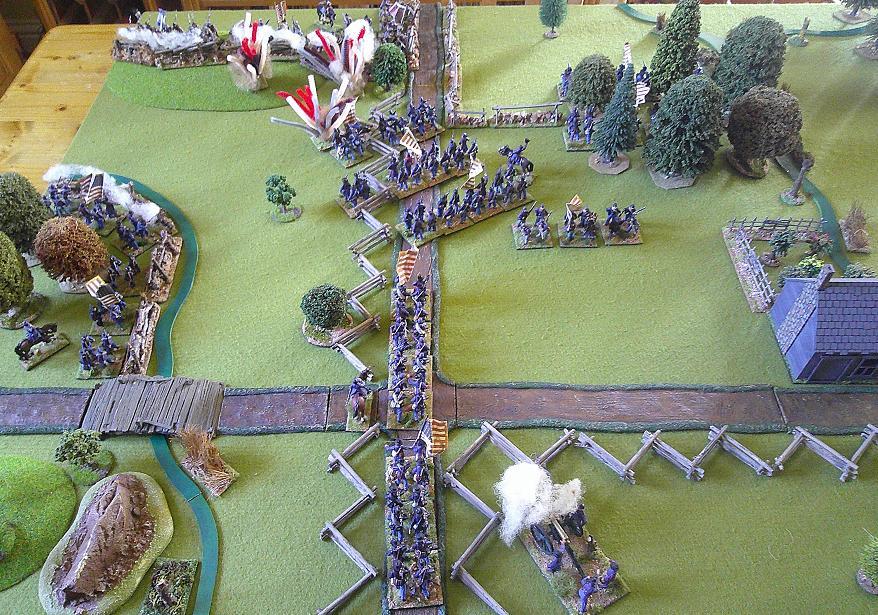
End of Turn Two. At this point, I began to realise my assault was a bit too far to the right, and ought to have entered more to the left.
End of Turn Three, with my assault beginning to shift its line of approach, while a battery of 12pdr smoothbore guns moves on to the table in support.
End of Turn Four. My advance continues, but at the top of the picture Farthing is shifting is reserve regiment to his left line of works.
Farthing moving his reserve regiment, while artillery shells rain down and the defenders exchange fire with the Union troops behind their works along Hazel's Creek.
End of Turn Six, with one of my regiments retreating already, two have disappeared into Robinson's Wood, while Fisher's Brigade is now arriving along the road as support for the attack.
End of Turn Seven, with my attack not making a lot of headway, and the Confederate cavalry under Lovelace are now arriving away to the right. My cavalry was delayed in its arrival!
A steady and continuous fire of muskets and cannons along the Confederate line on East Hill.
Lovelace's Cavalry Brigade - three regiments - heading for the ford at Philby's Farm.
In goes a Union assault. Under the rules, artillery in close combat are normally overrun automatically, but as these are behind fieldworks I decided they could fight like a single infantry base. In the event, they fought well, almost to the end of the game.
Wave attacks seemed the best option to me, so regiments lined up to take their turn. Except I should have done it on a wider front! Plus some regiments refused to charge but stopped to exchange fire, which was not the best idea!
End of Turn Eight and Carraway's Brigade of the Confederates has entered the field at the top right, while my cavalry under Colley has finally arrived, heading for the ford. The 12pdr smoothbores are shelling East Hill, so it is overhead fire, in case you were worried about the Union troops in the line of fire!
Confederate cavalry and Union infantry facing off across the orchard.
Carraway's Brigade arriving. The general proved to be more methodical than me and decided to get his troops all into a good position before launching his attack, as you will see!
End of Turn Nine. The Confederate cavalry are in position to deny the ford to their Union opponents; the skirmishing continued here for the rest of the game without either side gaining a real advantage. In the centre, Fisher's Brigade is deploying for an assault; Munning's Brigade is looking a bit the worse for wear!
End of Turn Ten. Carraway is lining his brigade up for an attack against the right flank of my main assault. I ruled that Robinson's Wood was in the way, so my troops could not see them and react accordingly. My troops are not making any headway against East Hill.
Carraway's Brigade deploying for my undoing!
End of Turn Eleven. The defenders on East Hill have repulsed all attacks so far.
I finally managed to buy and paint a horseholder for dismounted cavalry.
Carraway's Brigade crossed Chigley Run and enters Robinson's Wood.
General Colley grabs a Union infantry regiment and leads it in a charge against the orchard, driving out the Confederate troopers. I allow a general to pinch another brigade's regiment if he attaches himself to it personally and leads it.
By now the firing was going in all directions!
Carraway's Brigade bursts out of Robinson's Wood and crashes into the flank of my main assault, with expected results!
Another assault, on a wider front, which had more success this time!
End of Turn Twelve, with my troops about to break into the defences on East Hill, but with disaster looming in the centre!
The die roll to extend the game allowed two more turns. This is the end of Turn Thirteen. The Union troops have got into the defences on East Hill, but Carraway's attack has dislocated my forces in the centre of the field.
End of Turn Fourteen. The Confederates will have to abandon East Hill, but have prevented my Union troops doing any better than that.
The last photograph shows the battle movements. I have to decide now what happens next, as the Confederate division is now split into two separated parts, as the Union division has secured a position between them.


Very enjoyable read, thanks.
ReplyDeleteThanks Norm, glad you enjoyed it.
Delete